Instant Ice
Approximate Time to Complete: 1-2 Hours + Questions & Journal Time
Approximate Time to Complete: 1-2 Hours + Questions & Journal Time
This experiment can be an exciting way to dive deeper into the concept of phase changes that you learned in Different Properties at Different Temperatures. We just added new nomenclature cards on phase changes too! You can access them in our Online Classroom.
You’ll Learn
Pre-Activity Questions
Before you begin, put your “patient pants” on. This experiment can be very particular and may take a couple of tries. Trust us though, when you finally get it, the excitement is worth it!

Use these questions as a guide to write a journal entry, make a poster, give a presentation, or write a research report about your experiment or a related topic.
Imagine you’re building a card house. One by one, you stack each card in a perfect pattern to build a giant structure. It takes A LOT of time and energy.
Then, your friend comes over and knocks it down. That didn’t take very much energy.
The cards are like H2O (water) molecules. Making a cardhouse out of the cards is like freezing water molecules into ice. Knocking a cardhouse down is like melting ice.
Water particles are liquid. They cling closely enough to touch each other, but they’re free to move around. Ice particles on the other hand are very rigid. They stay near each other in an organized pattern (like the cardhouse).
In order to go from ice to water, you only need a little bit of heat energy. You can break apart the organized structure of ice by raising the temperature above 32 °F (0 °C). If you put a piece of ice out on the counter, it will immediately start melting.
In order to go from water to ice, it takes more energy. It takes more energy to organize particles than it does to break them apart – just like how it took more energy for you to make your card house, and less energy for your friend to knock it down.
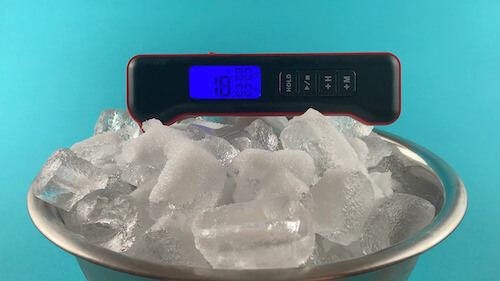
If you lower the temperature of water below 32 °F (0 °C), the water will cool and cool until FINALLY it has enough energy to start organizing into ice crystals. Then, the rest of the water will turn to ice very quickly. Just before any ice crystals form, we say that the water is “supercool.” The water is colder than it’s freezing point, but it is still liquid.
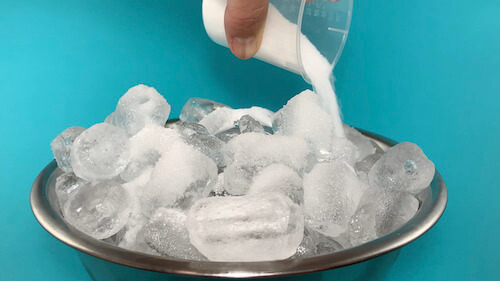
You could do this in the freezer, but using the salty ice bath method helps it happen more quickly … can you think of why that might be?
Here’s a hint, it has to do with freezing point depression.
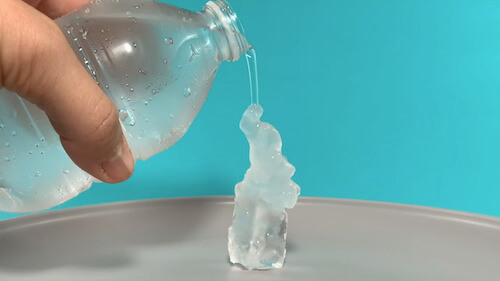
In part 2 of this experiment (Instant Ice in a Bottle), you try to catch the water right before the first molecules organize themselves. Then, you can give them some extra energy by hitting the bottle on the counter. That extra energy helps the molecules move around and get into a perfect position to start organizing into ice.
In part 3 of this experiment (Instant Ice Tower), you use an ice cube as a seed crystal to start the freezing process. When the supercooled water hits the ice, the water molecules immediately align themselves with the organized, frozen water molecules in the ice cube.
You seem to have made “instant ice.” However, you just waited until right before ice formed on its own, and gave it a little extra “oomf.”
The reason that the tap water freezes has to do with the minerals in it. The minerals in tap water give the water molecules something to cling to and start building ice crystals off of. Kind of like how you used an ice cube as a seed crystal in part 3 of this experiment. It doesn’t need as much time or energy as purified water to form ice crystals, because the minerals give tap water a head start.
Are you interested in seeing what Montessori Laboratory’s big-picture lessons, hands-on experiments, and engaging science activities are all about? Check out the free lessons below!
Want more lessons like these ones? Get access to all of our lessons with a Montessori Laboratory membership!